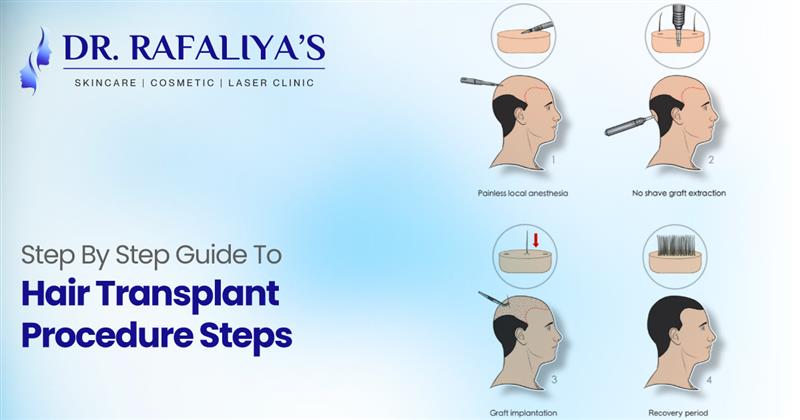
Hair Transplant Procedure Steps
If you have less hair, it's a big confidence blow for lots of people. Whether it’s a receding hairline, a thinning crown or a patchy beard, it can make you look older than you feel. And that’s where a Hair Transplant in Ahmedabad at Dr Rafaliya’s Skin Care Clinic comes in as a permanent solution. It’s not only your hair that you want to reclaim, but some of your self-esteem.
If you’ve been wondering about it but are clueless about what all goes down during the hour-long treatment, let us break it down step by step. No confusing medical jargon, just a straightforward set of instructions

Step 1: The Consultation
Each hair transplant treatment begins with a thorough consultation. It is the time in which your surgeon evaluates your scalp, recognises a hair loss pattern and listens to what you are hoping for. You will discuss a medical history, diet and exercise habits or goals. The doctor might also snap pictures for a before-and-after comparison.
It is a critical stage because it determines if you are a good candidate for transplant. Some have a sufficient amount of donor hair (the denser area of the scalp), whereas some may need to look into other options. When your surgeon finally gives the all-clear, you advance to the next stage.
Step 2: Planning the Hairline
This is a design step. Based on the shape of your face, how old you are and which direction your natural hair grows, the doctor draws what your new hairline will look like. A good hairline is natural-looking and matches your face type. This phase needs to be both medically precise and artistic.
(The end goal, after all, isn’t simply more hair, but the look of it never having been gone.)
Step 3: Preparing the Donor Area
Your donor area is where the hair on your scalp (typically the back or sides) is genetically resistant to balding and denser. The donor area is cut short for the convenience of extraction before initiating the hair transplant. The doctor will then apply a local anaesthesia just to make sure you do not feel any pain during the process.
When you are comfortably numb, it’s time for the next big move! Extraction.
Step 4: Extracting the Hair Follicles
Here’s where the actual transplant begins. There are mainly two popular methods used :
- FUE (Follicular Unit Extraction) : Individual hair follicles are carefully removed one by one using tiny punches.
- FUT (Follicular Unit Transplantation) : A small strip of scalp containing hair is taken from the donor area and then divided into grafts.
Both are highly effective, but nowadays FUE is more preferable: it causes fewer scars and wounds, and has a quicker recovery. The harvested follicles are then immersed in a special solution to preserve their health before implantation.
Step 5: Formation of the Recipient Sites
Once the hair follicles are ready, the doctor can then begin preparing the balding or thinning area for new hair growth. Little cuts are created with tiny instruments. The incisions and the angle, direction and depth of these are all strategically placed to offer you the most natural look.
That is one of the most refined steps while performing a hair transplant, as it will tell you what your grown hair shall look like.
Step 6: Implanting the Hair Follicles
Now, actually depositing new hair. Individual follicles are then placed in these slits. It’s a meticulous process that can take some time to complete, depending on the number of grafts you’re having transplanted.
More than likely, you will ride the wave of relaxation, listen to some good tunes, maybe even doze while your surgeon and team get down to business. Your new hairline design will begin to appear on your scalp before the end of this process.
Step 7: Post-Procedure Care
After your hair transplant, you will receive aftercare advice to ensure it heals as it should. It includes tips on washing, prophylactic medications and some off-limits options from those first few days.
You may have a little redness, slight swelling or some scabbing for one to two weeks, and that’s absolutely normal. The majority get back to their routine life in a couple of days.
Step 8: The Waiting Game
This is where patience, as ever, has its reward. The transplanted hair often falls out within several weeks. Don’t worry, this is part of the normal cycle. Once new growth starts around the third or fourth month, by the eighth month, it will be noticeable.
Results are generally full after a year, and once those new hairs have sprouted, they are permanent. You can cut, style and dye them as your natural hair.
Final Thoughts
A hair restoration surgery is not a temporary solution; it’s a well-thought-out investment in the journey to regain your hair and ultimately, confidence. From consultation to final growth, each step is essential for natural, successful outcomes.
If you have been on the fence about it, you might want to consult an experienced professional. You can visit Dr Rafaliya’s Skin Care Clinic for expert advice. Today’s technology is sophisticated, and the results are very natural, but most importantly, when performed by skilled practitioners, it is entirely safe.
You will like the way you look, now that you have got your hair back. After all, the best confidence is when it is effortless- just like your new hair.

